Easy Crochet Pumpkin Pot: Free Beginner Pattern
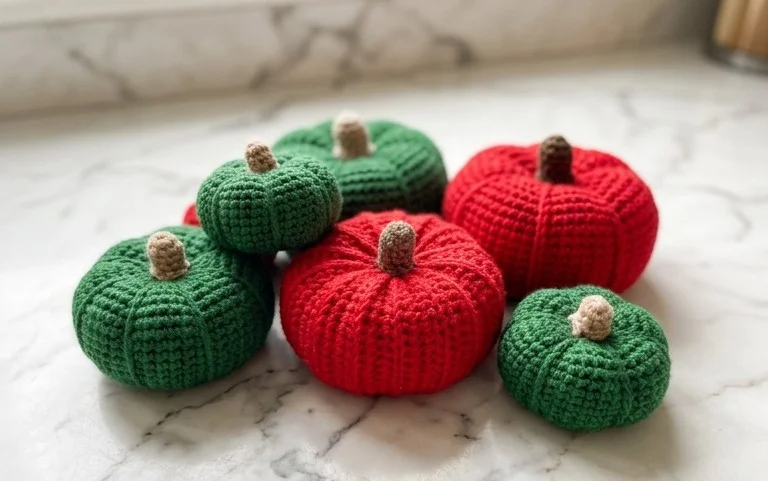
Dense loops of chunky cotton cord form the base of this pumpkin pot, creating a weight and texture that feels substantial in your hands. This project brings a festive touch to your home decor during the cooler months without requiring advanced crochet skills or complicated color changes. Working primarily in back loops only, you build a firm structure that holds its shape even when filled with heavy items like pinecones or holiday treats. Beginners find this a rewarding experience because the rapid growth of the fabric provides immediate results, making it a great choice for quick handmade gifts.
Why You’ll Love This Pattern
This beginner-friendly project creates a structured, durable crochet basket using the sturdy single crochet stitch in back loops only. The design relies on the weight of a chunky yarn paired with a smaller-than-recommended hook size, which results in dense, rigid walls that hold their shape without the need for additional stiffeners. Because the pattern works in continuous rounds, you avoid visible seam lines, resulting in a clean, professional aesthetic that functions well as home storage for yarn, books, or bathroom essentials. The repetitive nature of the rounds makes this an ideal project for working on while listening to podcasts or relaxing in the evening.
The texture of this basket is much firmer than other patterns I have tried, and it actually stays standing up even when it is empty.
— Sarah, home organizer
Pattern Overview & Skill Level
- Skill Level: Beginner
- Approximate Time: 2 to 3 hours
- Construction: Continuous rounds starting from a flat circular base, working upward into a vertical tube.
- Finished Dimensions: 8 inches in diameter and 6 inches in height.
Materials & Supplies Needed
- Yarn: Super Bulky weight (#6), 100% cotton cord or jersey yarn, approximately 150 yards.
- Hook Size: 8.0 mm (L-11).
- Notions: Tapestry needle for weaving ends, stitch marker to track the start of rounds, scissors.
- Safe yarn substitutions: Acrylic chunky yarn may be used, though the basket will be slightly softer and may require a stiffening spray to stand perfectly upright. If using a thinner weight yarn, hold two strands together to maintain the structural integrity.
Stitch Guide & Abbreviations (US Terms)
- ch: chain
- sc: single crochet
- inc: increase (work 2 sc in the same stitch)
- sl st: slip stitch
- BLO: back loop only (insert hook under only the back loop of the stitch instead of both loops to create a ridge)
- st/sts: stitch/stitches
- MR: magic ring (a method of starting a round by crocheting into an adjustable loop)
Step-by-Step Pattern Instructions
Basket Base
Work in continuous rounds. Place a stitch marker at the start of each round to keep track of the count.
- Rnd 1: Start 6 sc in a MR. (6 sts)
- Rnd 2: Inc in each st around. (12 sts)
- Rnd 3: [Inc, 1 sc] repeat 6 times. (18 sts)
- Rnd 4: [Inc, 2 sc] repeat 6 times. (24 sts)
- Rnd 5: [Inc, 3 sc] repeat 6 times. (30 sts)
- Rnd 6: [Inc, 4 sc] repeat 6 times. (36 sts)
Basket Walls
- Rnd 7: Sc in BLO of every st around. (36 sts)
- Rnd 8: Sc in every st around. (36 sts)
- Rnd 9-18: Repeat Rnd 8 until the basket reaches the desired height of 6 inches. (36 sts per round)
- Rnd 19: Sl st in each st around to create a finished edge. Fasten off.
Assembly and Finishing
Use a tapestry needle to weave the remaining yarn tail into the interior stitches of the basket. Ensure the tail is secured tightly so the base does not pull open. Gently tug on the sides of the basket to square up the walls and ensure the base sits flat on your surface.
Care & Washing Instructions
- Hand wash in cool water using a gentle detergent to prevent the fibers from stretching or pilling.
- Lay the basket flat on a clean towel to air dry, ensuring it is shaped correctly before it dries fully.
- If the basket loses its shape over time, lightly mist with water and reshape by hand, then allow to air dry completely.
Pro Tips & Common Mistakes to Avoid
- Maintain consistent tension throughout the project; because you are working in BLO, loose stitches will be more noticeable in the vertical walls.
- Always move your stitch marker at the beginning of each round to prevent losing your place, which is the most common cause of uneven basket height.
- Weave your ends by moving the yarn under several stitches on the inside base of the basket; changing directions twice will ensure the tail does not work itself loose.
- To adjust the size, add more increase rounds to the base before starting the walls, keeping in mind that each additional increase round will require approximately 20 extra yards of yarn.
Frequently Asked Questions
Can I use a smaller hook to make the basket stiffer?
Using a smaller hook than 8.0 mm will make the stitches tighter and the fabric firmer, but it will also increase the difficulty of inserting your hook into the thick yarn, which may lead to hand fatigue.
Is this pattern suitable for complete beginners?
Yes, this pattern uses only the single crochet stitch and works in a simple circular repeat, making it an excellent way to practice basic construction without complex shaping.
How do I change the diameter of the basket?
To make a larger basket, continue working increase rounds (e.g., [Inc, 5 sc], [Inc, 6 sc]) until the base is the desired width, then proceed with the wall instructions.
Can I sell the baskets I make from this pattern?
You are welcome to sell finished items made from this pattern as long as you credit the original design and use your own photographs for the product listing.
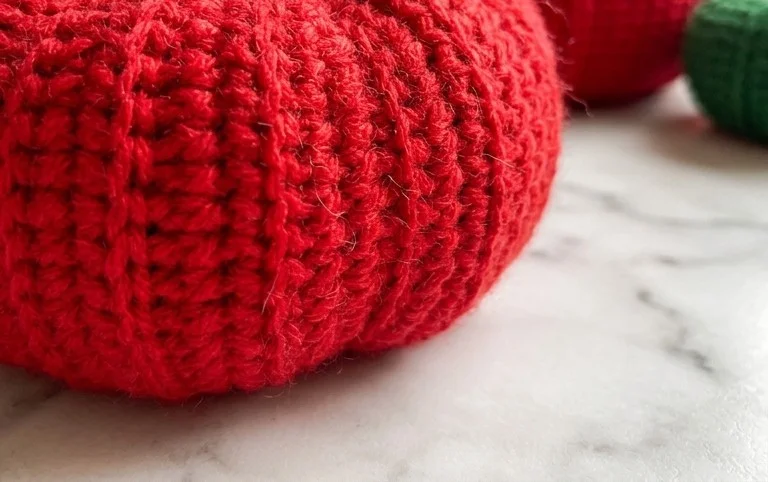
Your finished pumpkin pot brings a cozy, handmade warmth to any room, serving as a functional storage piece for seasonal greenery or small trinkets. If you want a smaller version for a desk, simply reduce the base rounds by one and work fewer rows in height. You can also experiment with muted earth tones like sage green or cream to match your year-round decor style. Share a photo of your project on social media to inspire others, then browse the blog archives for more free pattern ideas.