How to Crochet a Peppermint Pillow: Free Beginner Pattern
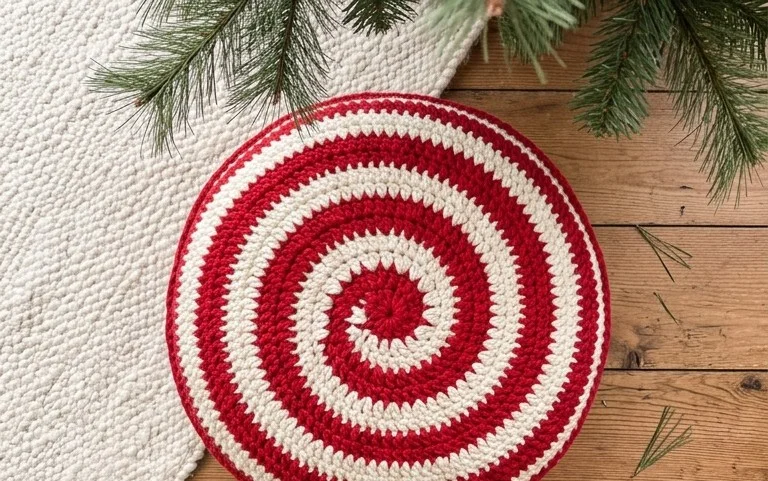
These plush, circular pillows resemble wrapped holiday candies with their bright stripes and soft, squishy texture. You will find that working this design helps you practice circular increases and tight tension control, which are skills you can use for almost any stuffed toy or home accessory. This project stays small, making it manageable for those limited on time or looking to use up leftover yarn scraps from other projects. Once you understand the basic construction of the sphere, you can adapt it to fit any color theme you have in mind for your living space or holiday decor.
Why Crocheters Love It
This beginner-friendly project works up in under two hours, making it an ideal choice for last-minute gift-giving or building confidence with amigurumi techniques. The classic sphere construction requires only basic shaping skills, allowing you to focus on maintaining consistent tension throughout the piece. Because it uses very little yarn, you can easily pull from your scrap bin to create a whole collection in various colors without needing to purchase new materials. The simple shape also serves as a perfect base for adding personality with different face placements or accessories.
I managed to complete this pattern in a single afternoon while listening to a podcast. The instructions for the increase and decrease rounds were very easy to follow, and my sphere turned out perfectly round on the first try.
— Sarah, amigurumi enthusiast
Pattern Overview & Skill Level
- Skill Level: Beginner
- Approximate Time: 1 to 2 hours
- Construction: Worked in continuous rounds using a magic ring and basic increases and decreases
- Finished Dimensions: Approximately 3 inches in diameter depending on tension
Materials & Supplies Needed
- Yarn: Worsted weight (#4) acrylic or cotton blend, approximately 30 yards per sphere.
- Hook Size: 4.0 mm (US G-6) hook to ensure tight stitches that prevent stuffing from showing through.
- Notions: Fiberfill stuffing, tapestry needle for weaving in ends, stitch marker to track round starts, and a pair of 8mm plastic safety eyes.
- Yarn Substitutions: You can use DK weight (#3) yarn with a 3.5 mm hook for a smaller version, or bulky weight (#5) yarn with a 5.5 mm hook for a larger, squishier result.
Stitch Guide & Abbreviations (US Terms)
- MR: Magic Ring (a way to begin by crocheting over an adjustable loop)
- ch: Chain
- sc: Single crochet
- inc: Increase (work 2 sc in the same stitch)
- dec: Decrease (sc2tog: insert hook in front loop of next two stitches, yarn over, pull through, yarn over, pull through all loops on hook)
- st(s): Stitch(es)
- sl st: Slip stitch
- ( ): Repeat instructions within parentheses as directed
Step-by-Step Pattern Instructions
Sphere Body
The body is worked from the center outward in a continuous spiral. Place your stitch marker at the start of every round and move it up as you progress.
- Rnd 1: Start 6 sc in a MR (6 sts)
- Rnd 2: 2 sc in each st around (12 sts)
- Rnd 3: (1 sc, inc) 6 times (18 sts)
- Rnd 4: (2 sc, inc) 6 times (24 sts)
- Rnd 5: (3 sc, inc) 6 times (30 sts)
- Rnds 6–10: sc in each st around (30 sts)
- Rnd 11: (3 sc, dec) 6 times (24 sts)
Insert your safety eyes between Rnds 7 and 8, spacing them about 4 stitches apart. Begin adding fiberfill stuffing now, adding more as you close the opening.
- Rnd 12: (2 sc, dec) 6 times (18 sts)
- Rnd 13: (1 sc, dec) 6 times (12 sts)
- Rnd 14: dec 6 times (6 sts)
Finishing
Fasten off, leaving a 6-inch yarn tail. Thread the tail onto your tapestry needle and weave it through the front loops of the remaining 6 stitches. Pull the thread tightly to close the opening and secure the knot. Weave the remaining tail into the center of the sphere to hide it.
Care & Washing Instructions
- Hand wash your finished item in cool water with a small amount of mild detergent.
- Gently squeeze out excess moisture by pressing it between two clean towels, then reshape the sphere while damp.
- Lay the item flat on a dry towel away from direct sunlight or heat sources to air dry completely.
Pro Tips & Common Mistakes to Avoid
- Consistent Tension: Keep your yarn tension slightly tighter than you would for a blanket or garment, as loose stitches allow the stuffing to peek through.
- Stitch Markers: Always use a stitch marker at the beginning of your rounds. Because you are working in a continuous spiral, it is very easy to lose your place without one.
- Weaving Ends: Use a long tail to sew the final opening shut by picking up only the front loops of the last row; this ensures a smooth, professional-looking closure.
- Adjusting Size: If you want a larger sphere, continue adding increase rounds (e.g., 4 sc, inc; 5 sc, inc) until the desired diameter is reached, then work even for a few rows before starting the decrease sequence.
Frequently Asked Questions
Can I use a different yarn weight for this pattern?
Yes, you can use any yarn weight as long as you pair it with a hook size slightly smaller than the one recommended on the yarn label. This helps maintain the tight stitch structure needed for stuffed items.
How do I know if I have the right tension?
If you see large gaps between your stitches when you pull the yarn slightly, your hook size is likely too large for your yarn. Switch to a smaller hook to close those gaps.
Is this pattern suitable for complete beginners?
It is very beginner-friendly. It covers the essential skills of working in the round, increasing, and decreasing, which are the building blocks of most 3D crochet projects.
Am I allowed to sell the finished spheres?
You are welcome to sell items made from this pattern, but please credit the original design when listing your work. Always check the specific terms provided by the original designer if you are using this as a reference for a larger business.
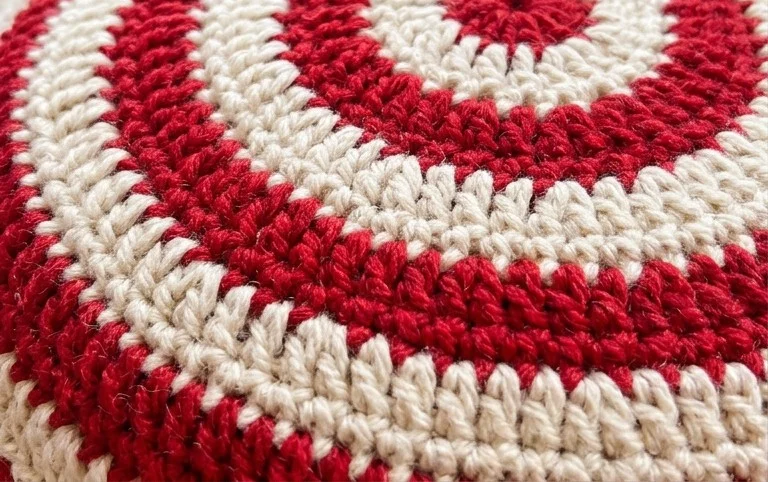
Your new stuffed candy piece brings a festive touch to any chair or shelf in your home. You can alternate the colors to match your favorite team or decorate with different yarn textures like velvet for extra softness. Please share a photo of your finished work on social media so others can see your color choices. You can also visit the main archive on the blog to find additional free patterns for your next afternoon project. Every bit of practice helps you grow as a maker, so enjoy your newest creation.